If you want effective protection for the fibreglass components of your boat, gel coat will improve the curb appeal of the vessel and provide a protective layer for the fibreglass, including UV and water protection. You can discover more about gel coats, what they are, and how to care for them here.
What a Gel Coat is?
A gel coat is a specific material that is applied on top of the boat surfaces and moulds. The material used when applying gel coat is typically an epoxy resin or polyester resin in a liquid state. Once the curing process is finished, the boat gets a smooth and glossy surface. Boat polishing and waxing also protect your boat from water infiltration.
Types of Gel Coat
There are multiple variants of gel coats, based on their application and boat building. Some common types of gel coats used in various industries include:
General Purpose Gelcoat
It is the most common gelcoat used for everyday applications. It can be a food fit for boat owners who want a layer of protection with a glossy surface but do not require all the performance attributes that other gel coats would have.
Tooling Gelcoat
Tooling gelcoats are made to endure high wear and tear. Since the mould retains a smooth surface, the curing process is key to having consistently high gloss finishes in boat building.
Marine-Grade and Specialty Gelcoats
Marine-grade epoxy resin provides a protective layer to fibreglass boats and other composite materials. It protects marine vehicles that often gain exposure to rough seas. Speciality gel coats are suitable for various industries where specific coloured gel coats, chemical resistance, or improved flexibility are required.
Key Benefits of Gel Coat
Prevent Damage
Gel coat provides a protective layer against UV rays, moisture, and other environmental factors. Once you apply this coating, it prevents the fibreglass from absorbing moisture and protects the boat’s surface from blistering. Gel coat also protects against UV damage, keeping your fibreglass boat usable for longer.
Glossy, Appealing Finish
A high-gloss finish looks better on the boat’s surface and slightly reduces drag in the water. Gel coats can produce a smooth, glossy surface that will reflect light most efficiently, resulting in the best overall finish. Boat owners want their boats to look good. They generally use a gel coat rejuvenator kit to maintain high gloss.
Durability & Longevity of Fibreglass
Gel coat expands the lifespan of fibreglass in various industries. The epoxy resin offers a protective layer against cracking and scratching. Since it prevents fading from exposure to the elements, it helps the underlying fibreglass retain its strength and integrity.
Care and Maintenance of Gel Coat
Proper care and maintenance of composite materials are essential to keep the gel coat shining, protected, and resilient.
Cleaning Tips (Avoid Harsh Chemicals)
Avoid using abrasive cleaners or strong chemicals that strip the protective layer off the surface. pH-balanced marine products and soft microfibre cloths are the best products for washing the boat surface. Remember to clean composite materials after every use to maintain the finish.
Waxing and Restorers for Long-Term Protection
Polishing and waxing the boat is essential for preserving its gloss and protective properties. Using a gelcoat rejuvenator kit for oxidised finishes restores the original gloss and protects from UV radiation and water exposure.
Suggested Marine Cleaning Products
A variety of polishing and waxing products are available for cleaning gelcoat surfaces and fibreglass boats. You should look for products that include:
Non-abrasive gel coat cleaners
Polishing compounds
UV-resistant waxes
Summary
A gel coat protects fibreglass boats for UV protection of the boat. Gel-coating not only assures an improvement of the boat’s appearance, but it also adds tremendously toward the life of your boat. Gel-coating is a key ingredient, with respect to maintenance, toward attaining a polished surface for your boat. It can remain ready to take on the punishment of the extremely challenging marine environment.
Are you refurbishing an older vessel or buying a new boat? Using protective-quality polishing and wax products will guarantee that your gel coat remains in good condition for a long time.
Frequently Asked Questions
Is gel coat the same thing as paint?
No. While they both provide a surface finish, gelcoat is a resin-based product applied during the manufacturing of fiberglass components. Paint is applied once the component has been manufactured.
Can I apply gel coat over existing gel coat?
Yes, if the surface is prepared properly, you can apply a new gel coat over the existing one.
How long does gel coat last?
If properly cared for, gel coats can last several decades. Boat polishing & waxing regularly can maintain gel coat surfaces for an extended period.
Does gel coat protect against UV & water?
Yes. Gel coating protects the gel from UV and water damage.
Water engulfs Australia from all sides, making boating a go-to recreational activity on this massive island. But while holding that steering in those thrilling waves, safety should never be an afterthought.
Between 2005 and 2015, 473 Aussies drowned while using a watercraft. Only 10% of all those were wearing a life jacket. A life jacket is necessary to play it safe on the water.
During a boat ride, life jackets are probably (or the most) essential safety gear you can carry.
But carrying it is half the job done. That’s because the rules in the country differ state to state and knowing when and how to wear is another key part of the equation. That helps you get back safely to the shore and avoid hefty penalties as well.
So buckle up and let’s dive into those boat life jacket rules so you can stay compliant and safe.
Overview of Jackets
Life jackets or personal flotation devices (PFDs) are made to keep your head above water if you drown. Since a one-fits-all approach can be risky, there are different types and styles available like inflatable and non-inflatable jackets and are tailored for various water conditions and activities.
Personal flotation devices must be accessible, appropriately fitted, and in excellent condition. Their effectiveness can be compromised if worn incorrectly or serviced regularly. Knowing what type suits your activity and environment is the first step in staying protected.
Why Do You Need to Wear a Lifejacket?
The answer to this question is a no-brainer: “Because your life’s at risk while boating.” Life jackets or personal flotation devices aren’t some penalty-saving gears. They can potentially save your life as well. Accidents on the water happen in a jiffy, often with no warning.
This checklist gives you enough good reasons to always wear a life jacket:
It keeps your head above water if you fall in unexpectedly.
Helps you stay afloat even if you’re tired or injured.
Essential during restricted visibility or a sudden severe weather warning.
Increases your chances of survival until help arrives.
It makes it easier for you to spot rescue teams in rough water.
It’s required by law in many boating situations across Australia.
These offer the highest level of buoyancy and are suited for offshore and open waters. They are bulkier but provide excellent flotation and keep your head above water.
Coastal life jacket designs often fall under this category. These are mandatory in many situations, especially when boating in enclosed waters or far from shore.
Type 2 Lifejackets – Level 50 PFD
These are suitable for inshore waters and are often used for water sports. They are lighter than Type 1 and more comfortable, but do not provide the same level of flotation.
Depending on the state rules, you must wear a lifejacket when participating in certain recreational vessel activities.
Type 3 Lifejackets – Level 50S
Similar to Type 2 in flotation, but available in sportier designs. They’re often worn during kayaking, water skiing, or operating personal watercraft. They’re not recommended for offshore use.
Type 1 Inflatable Lifejacket
Inflatable lifejackets are compact and more comfortable than traditional foam ones. They inflate automatically or manually when needed. If using these, ensure the manual inflation toggle is not obstructed.
They must also be serviced regularly and tested for leaks. Many boaters prefer inflatable lifejackets for their comfort and ease of movement.
Lifejacket Requirements Under the National Law
According to the Australian Maritime Safety Authority, national laws apply primarily to commercial vessels, but safety principles influence recreational guidelines too.
All recreational vessels must carry the appropriate number and type of lifejackets on board, suitable for the size and type of boat and the waters being navigated.
Each lifejacket must comply with current lifejacket standards, and children or non-swimmers are especially encouraged to wear one at all times.
These requirements are bare minimums; states and territories can apply additional rules.
Rules When You Must Wear a Lifejacket
The following are common conditions across most jurisdictions where you must wear a lifejacket:
Children under a certain age (usually 12) must always wear a lifejacket on a recreational vessel.
All occupants must wear a lifejacket when crossing a coastal bar or rough water.
Lifejackets must be worn during a severe weather warning or when visibility is low (restricted visibility).
Solo boaters or those in tinnies under a specific size must wear a lifejacket.
In many states, you must wear a lifejacket while in enclosed waters, especially if you’re in a small vessel.
These rules for life jackets on boats aren’t just about the safety equipment on board. The law clarifies that there are times when wearing lifejackets is not optional.
Lifejacket Regulations By States
Each state and territory in Australia has its own set of rules. Here’s a breakdown:
ACT & NSW
In New South Wales and the ACT, everyone (from drivers to passengers) must wear an approved lifejacket. You must wear a lifejacket when boating alone, at night, in enclosed waters, or during adverse weather. Inflatable lifejackets are allowed but must meet servicing requirements.
The jacket must be level 50S+ when in enclosed waters, and in open waters, the standard should be 100 or greater.
NT
Northern Territory laws focus on responsibility. All passengers on board must carry lifejackets. You must wear a lifejacket level 100+ in open waters and level 50+ in inland waters.
Qld
In Queensland, children aged 12 must wear lifejackets on boats. Adults must wear a lifejacket in hazardous conditions, including severe weather warnings. Inflatable lifejackets are common, but they must meet legal standards. The Level 50s are fine for smooth waters, and 100+ is suitable for partially smooth waters.
SA
South Australia requires that you must wear a lifejacket (Level 50S+) on vessels when operating in protected or enclosed waters. For unprotected waters, a Level 100+ lifejacket is mandatory for every individual.
TAS
Tasmania is strict about its life jacket regulations. If your recreational vessel is under 6 metres, you must always wear a lifejacket, regardless of conditions. All lifejackets must be Australian Standard-compliant. This rule includes inflatable lifejackets, provided they’re serviced regularly.
VIC
Wearing lifejackets (Level 100+) in Victoria is mandatory on sheltered or enclosed waters. In this state, you must wear a lifejacket with a Level 50+ in inland water.
WA
Western Australia requires lifejackets on board for each person over 12 months of age. You must wear a lifejacket of Level 100 or above in unprotected waters.
New Australian Standard on Life Jackets Required on All Boats
Recently, lifejacket regulations changed, making Australian Standard (AS) 4758 the only acceptable standard. These lifejacket standards apply to both foam and inflatable lifejackets. Many older standards like AS 1512, AS 1499 and AS 2260 are no longer compliant.
Lifejackets with an AS 4758 standard are better because:
They have increased buoyancy
They use new technology
They have increased reflectivity
They display a level 50, 50S, 100, 150+
The goal is to phase in safer, more effective designs across all recreational vessels, and failure to meet the standards can lead to penalties.
Conclusion
What’s fun, freeing, and fearless can easily turn into a no-warning nightmare. Avoiding these disasters and saving yourself from perilous situations needs some basic prep only. One of them is to wear a lifejacket.
Feeding all those whens and wheres of wearing lifejackets or personal flotation devices (PFDs) does seem to be a mental gymnastics. But once you’re well-versed with the laws and keep your safety equipment in good shape, you’ll save your life and money as well.
Awareness is your best defence here. From state-by-state variations to the latest standards, maintaining inflatable lifejackets, servicing them regularly, and keeping them accessible are life-saving habits after all.
Having a boat is more than a weekend hobby. It’s a responsibility. Do you cruise the lakes, coastlines, or deep seas? Whatever interests you, your boat needs regular care. Like a car or home, skipping maintenance results in budget-draining problems and frustrating downtime. But staying ahead of the issues isn’t that challenging. Just be consistent and follow these no-fluff hacks. Your boat will be in top shape.
Stick to a Seasonal Maintenance Schedule
Your boat’s needs shift with the seasons. So, follow a seasonal maintenance checklist. When it’s spring, check the hull for cracks or blisters, test the battery, and inspect the fuel system. Summer’s prime boating time, making it ideal for boat detailing in Perth to keep your vessel pristine.
Focus on regular engine checks, cleaning, and monitoring fluid levels this season. Come crisp and colourful fall. Prepare your boat for storage now. Flush the engine, clean the bilge, and cover the boat well. Winterising your boat properly helps avoid freeze damage and corrosion.
Tip: Keep a logbook of all maintenance work. That’s handy for tracking and boosts resale value.
Keep the Hull Clean and Protected
The shinier your boat’s hull, the better its appearance. But looks aren’t the only factor here. Hull directly affects performance. Algae, barnacles, and grime, stuck on the hull, create drag, reduce speed, and increase fuel use.
Pressure wash the hull every 4 to 12 weeks, especially if your boat stays underwater for long durations. Apply antifouling paint yearly to prevent marine growth and protect the surface.
Inspect and Maintain the Engine
If the boat is a body, the engine is the soul. Without an engine, it’s a lifeless structure. So, engine upkeep becomes paramount. Check the oil and coolant levels before each trip. Look for levels and worn belts or hoses. Is the engine oil old? Are the filters choked with dirt and debris? Change them.
Don’t forget to flush the engine with fresh water after each use. If you’ve been boating in saltwater, it’s a must. Salt causes corrosion, the biggest enemy of your boat’s engine.
The Battery Needs Utmost Care
Having a dead battery is the last thing you want on a perfect day on the water. Check battery terminals for corrosion and keep them tidy. Before each outing, it has to be fully charged. Not in use? Storing it in a dry, cool place is your best option. Like every component, your battery needs fuel, too. Keep it topped off with distilled water.
And here’s a simple one. Turn off all electrical components when the engine’s off to avoid wasting time on jump-starting or charging it later.
Don’t Ignore the Propeller
Propellers look tough, but they’re vulnerable, as well. Assess them regularly for dents, cracks, or tangled fishing lines. What you think is a minor nick can mess with performance and fuel efficiency. The propeller seems out of balance or wobbly? Repair or replacement is the best option.
Remove it a few times during the season to check for fishing lines wrapped around the shaft. This can damage the seal and let water into the gearcase.
The Bilge Should Be Dry and Clean
This often-hidden part is usually forgotten. But it matters. Clean bilge prevents foul odours, mould, and long-term corrosion. Wipe it out after each trip. You can use a bilge cleaner every few months to eliminate grime and oil buildup.
Also, check that your bilge pump works well. A faulty pump and a minor leak can become a heavy setback.
Watch for Electrical System Wear
In the marine environment, wires and connections can corrode fast. Look for signs of fraying, corrosion, or wear. Protect connections and seal off moisture with dielectric grease. Check all lights, navigation, cabin, and anchor, and replace bulbs as needed.
Have you installed electronics like fish finders, radios, or GPS units? Make sure they’re drawing power well and are not stressing the battery.
Final Thoughts
Boating is fun. Focus on maintenance if you don’t want it to turn into a regretful plan. Regular maintenance delivers peace of mind and a fun time on the water. And it’s not that complicated. Stick to a schedule, pay attention to the small stuff, and respect your investment. Take care of your boat, and it’ll take care of you.
Nothing beats the feeling of slicing through the water on a sparkling, well-maintained boat. Whether you’re gearing up for a regatta or just want your vessel to turn heads at the marina, mastering the art of boat detailing is key. In this guide, we’ll dive into essential tips that guarantee your boat not only floats but also dazzles like new. Ready to cast off? Let’s make waves with some expert detailing advice!
Chapter 1: Setting the Stage – Prepping Your Boat
Before you start applying products or buffing surfaces, a thorough preparation is crucial. Begin by removing any personal items, fishing gear, or water sports equipment from your boat. This decluttering phase makes the cleaning process smoother and ensures no nooks or crannies are overlooked.
Clean Slate: Start with a basic wash using fresh water to eliminate surface dirt or salt. This initial rinse sets the stage for a deeper clean and helps prevent scratches during the detailing process.
Spot Check: Look for any areas that need special attention, such as mildew stains or built-up grime. A targeted approach here can save you time later.
Chapter 2: Washing – More Than Just Soap and Water
Washing your boat is more than just a splash; it’s about choosing the right cleansers that won’t harm the marine environment or your boat’s finish.
Choosing Your Cleanser: Opt for pH-neutral, biodegradable soaps specifically formulated for marine use. These products effectively clean without damaging the wax or paint.
Technique Matters: Use a soft sponge or a lamb’s wool mitt to apply the soap. Start from the top and work your way down, ensuring that grime and soap don’t drip onto already cleaned areas.
Chapter 3: The Magic of Polishing – Bringing Back the Shine
Polishing not only enhances the appearance of your boat but also protects the finish. Here’s how to get that glossy look:
Select the Right Polish: Depending on the age and condition of your boat, choose a polish that suits the level of oxidation. For newer boats, a light polish might suffice, while older vessels might need a more abrasive solution to restore their shine.
Application: Apply the polish in a circular motion using a soft cloth or a buffer. Work in small sections to maintain consistency and control over the shine.
Chapter 4: Wax On, Wax Off – Protecting Your Shine
Applying wax is crucial for protecting your polished finish from the elements.
Choosing Wax: Opt for a high-quality marine wax that offers UV protection to prevent fading and oxidation.
Technique: Apply wax in thin, even layers using a foam applicator. Allow it to dry to a haze before buffing it out with a microfiber towel. This step is about patience and elbow grease, but the result is a hard-wearing shine that repels water like a duck’s back.
Chapter 5: The Role of Antifoul Paint – Guarding the Hull
Antifoul paint plays a pivotal role in maintaining the hull’s integrity and overall performance of your boat. This specialised coating prevents aquatic organisms from adhering to the hull, which can degrade performance and increase fuel consumption.
Application Tips: Before applying antifoul paint, make sure the hull is completely clean and dry. Apply the paint evenly, taking care not to miss any spots. This preventive measure is your underwater suit of armour against the relentless sea.
Chapter 6: Interior Detailing – Comfort on the Inside Counts, Too
A pristine exterior deserves an equally clean interior. From upholstery to the dashboard, every component needs your attention.
Upholstery Care: Clean fabric seats with a marine upholstery cleaner and a soft brush to lift stains. For leather, use a conditioner that provides moisture and prevents cracking.
Cleaning Non-Fabric Surfaces: Wipe down hard surfaces with a mild cleaner and a microfiber cloth. For clear plastics and glass, use a cleaner that leaves no streaks for unobstructed views.
Chapter 7: Regular Maintenance – A Habit of Excellence
Detailing your boat is not a one-off task. Regular maintenance ensures your boat remains in showroom condition and ready for the seas whenever you are.
Routine Checks: Regularly check for any signs of wear or damage. Addressing small issues promptly can prevent larger, more expensive problems down the line.
Scheduled Detailing: Set a detailing schedule that matches your usage patterns. Frequent outings might require more regular detailing to keep everything shipshape.
Chapter 8: Advanced Techniques for Impeccable Detailing
As you dive deeper into the art of boat detailing, exploring advanced techniques can elevate your game and ensure your vessel not only shines but also stands out at the dock.
Detailing Clay for a Deeper Clean: Utilize detailing clay to remove embedded contaminants from the gelcoat that washing alone can’t tackle. This step is crucial for creating a truly smooth surface before polishing. Glide the clay bar over a lubricated section of the boat’s surface, and you’ll feel the resistance decrease as it picks up particles embedded in the gelcoat.
Compounding for Restoration: If your boat’s finish has severe oxidation or staining, using a rubbing compound might be necessary. Apply the compound with a buffer, focusing on one section at a time. This restores the gelcoat by removing a thin layer, revealing the untouched surface beneath.
Chapter 9: Detailing Like a Pro – Tips from the Experts
Even seasoned captains can learn a thing or two from professional detailers. Here are some insider tips that can help you achieve professional results:
Keep Your Tools Clean: Always clean your brushes, cloths, and applicators after each use. Residue from previous cleanings can cause scratches or improper application of products, diminishing the quality of your work.
Use Tape on Sensitive Areas: Protect hardware and trim by applying painter’s tape before starting your detailing work. This prevents accidental scuffs or polish stains on areas that can be difficult to clean later.
Detail in the Shade: Whenever possible, detail your boat in the shade or on a cloudy day. Direct sunlight can cause cleaners and wax to dry too quickly, which can lead to streaks and uneven finishes.
Conclusion: Smooth Sailing Ahead
With these tips, your boat detailing routine will ensure that your vessel not only looks fantastic but also operates at its best. Remember, a clean boat is a happy boat, and a happy boat makes for joyful adventures on the waves. So grab your supplies, and let’s make every detail count!
Now, let’s set sail into a horizon of gleaming decks and shining hulls, where every wave whispers a tale of meticulous care and love for the sea. Happy detailing!
Do you own a specialty boat but are unsure how to manage and maintain her? A lot goes into keeping your boat in good shape and functioning at its optimal capacity. Detailing specialty boats requires more than just a bucket of soap and a sponge. To maintain these vessels in excellent condition, sophisticated methods are needed. In this blog, we’ll teach you all you need to know to maintain the best possible condition for your boat to extend its lifespan, from exterior to interior detailing.
Start With Pre-Rinsing
The first thing you must do for exterior detailing is wash the cover. Then, you can rinse her exterior surface to eliminate any debris or loose dirt. This is among the most crucial phases in the boat detailing process. Rinsing and/or washing from top to bottom is the golden rule. Doing this ensures that no dirt or grime you wash off ends up in a spotlessly clean area of your boat. After pre-rinsing the boat, fill the buckets with water and apply marine detailing soap. Don’t forget to use soap designed especially for boat surfaces.
Move onto Wash and Scrub
Wash and clean every part of your boat with marine soap, a long-handled brush with soft bristles, and a non-abrasive wash mitt. Any places with lingering stains or bird droppings require extra attention. Use circular strokes, rinse as you go, and concentrate on one area at a time. When cleaning your boat with a wash mitt, rinsing every area immediately after washing is crucial since dried soap can leave stains or possibly destroy your coating’s layers. To keep debris out, rinse your wash mitt frequently. Take care to avoid damaging the paint or scratching the surface. Most of the work is done by the soap, so use a high-quality marine-grade soap that doesn’t require a lot of power to scrub.
Do a Final Rinse
After washing and scrubbing, you need to do a final rinse, but this time, use the nozzle on one section at a time after you’ve cleaned and scrubbed the entire boat. Allow the water to flow freely to prevent beading and water stains.
Wipe Her Down
After rinsing, carefully wipe and dry every surface with microfiber towels. Don’t let your boat dry by itself because you want to prevent residue from the elements in the water. After you’ve finished wiping, carefully check every area for any blemishes, scratches, or damage that may require repair.
Moving Inward
With the exterior taken care of, it’s time to move to the interiors, starting with the engine and electronics. Use a damp towel to wipe and clean the electronics. Be careful here because getting water on your electronics could lead to corrosion or a short circuit. As with your boat’s paint, start by routinely cleaning the cowling on outboard engines with soap and water. To lessen swirls, use soft microfiber towels instead of harsh brushes. Take caution when it comes to the engine; after removing all the filth and grime, call it a day.
Teak Cleaning
A quick and easy way to clean teak is to use soapy water regularly. To protect the wood, use gentle bristles. An acid-based teak cleaner is advised in certain situations, but be careful to adhere to the manufacturer’s recommendations. Use caution when using special boat interior cleaners, as they can harm the gel finish and adjacent surfaces. To be safe, rinse off the teak before you all start slapping those cleaners on.
Cleaning Seats, Cushions, Metals, Carpets and Glass Surfaces
You must rinse, wipe, or vacuum seats and cushions frequently and wipe and dry them after cleaning them. When it comes to the carpet, after using a vacuum to remove any loose dirt, thoroughly clean the carpet with soap and a brush. To avoid mold, mildew, and unpleasant odors, rinse well and allow it to dry fully. With metal surfaces, such as Chrome railings, handles, ladders, horns, cleats, aluminum, etc – scrub, wipe, wash, use soap, and dry. For all glass surfaces such as windows, windshields, screens, etc, wash, scrub, and wipe frequently.
In Conclusion
There you have it, then. At first, boat detailing may seem overwhelming. There are numerous moving parts, aisles filled with specialty boat cleaners in marine supply stores, and contradicting online advice. However, as you now know, boat detailing only requires a few easy steps. So go ahead with your detailing process, and don’t forget to cover her up again after the detailing to shield her from the scorching sun.
If you are someone who enjoys fishing, whether as a professional or just as a hobby, you are at the right place. Fishing is a fun and relaxing activity that many Aussies enjoy as it connects us with nature. But, setting up a fishing rod can be confusing for beginners or someone who has never used one before. Let me tell you, you don’t have to be a pro to enjoy fishing. It’s just that you need the right equipment and must have the basic knowledge about fishing. We’ll discuss how to set up a fishing rod in a beginner-friendly way so that you can set it up all by yourself, along with choosing the appropriate fishing accessories for a successful angling experience.
What is a Fishing Rod?
Before discussing how to set up a fishing rod for beginners, it is essential to understand the tool. A fishing rod is an essential tool that is designed for you to catch fish easily in a relaxing way. It helps you cast your line into the water, feel the movement of a fish, and ultimately bring in your catch. Essentially, a fishing rod is a long and slender tool that can be held by the angler to cast their fishing line and control the movement of the fish. Its main purpose is to give you the proper flexibility and strength that you need to handle the challenges of fishing. Whether you are casting from the shore or a boat, a good fishing rod is your key to connecting with the underwater world and successfully reeling in your desired catch.
Different Parts of The Fishing Rod
Now that you have understood the basic concept of the fishing rod, let’s discuss the different parts of it to know the different features of the tool you are going to use. This will help you understand the process of fishing rod set up for beginners. Here’s a simple breakdown of the parts:
Fishing Pole
This is the main body of the fishing rod. It is also known as the rod blank. A fishing pole is usually made of materials like fibreglass or graphite. It determines the strength and flexibility of your rod. The length of the pole can impact your distance, control, and overall fishing experience. Therefore, you need to choose the right type of fishing pole so that you can handle different fishing situations with the right structure.
Fishing Line
This is the string that connects your rod to the fish. It’s a thin, strong string that you cast into the water to catch fish. This string is made from materials like monofilament, braided, or fluorocarbon. The fishing line is wrapped around the reel and extends from the rod. It allows you to cast your bait or lure into the water. Different fishing lines have different features, including stretch, visibility, and strength. So, you need to select the right fishing line for your specific needs, and it should fit your fishing rod perfectly.
Fishing Hook
The fishing hook is a sharp, curved, and hook-shaped device attached to the end of your fishing line. It’s designed to be pointy to catch the fish by piercing its mouth when the fish takes the bait or lure. These hooks are available in different sizes and shapes to address specific types of fishing and target species. Choose the right size and type according to the bait or fish you are targeting so that you can effectively hook and land your catch.
Fishing Handle
The fishing handle is also known as the grip. It is the part of the fishing rod that you hold onto while fishing. It’s usually made of comfortable materials like foam or cork and is located at the lower end of the rod. Choose a handle that gives you a secure grip so that you can control the rod during casting or retrieving.
Fishing Snap Swivel
This is a small and rotating device that connects the fishing line to different parts of the fishing rod, such as lures or leaders. It helps prevent your fishing line from twisting when you are retrieving and allows you to change the lures quickly without retying the knots. This means you can experience smooth casting and retrieval.
Ferrules
Ferrules are connecting joints in multi-piece fishing rods. They are usually found near the middle of the rod. It mainly helps the rod remain sturdy, and it functions as a single unit. You can easily assemble or disassemble ferrules whenever needed. This makes transportation and storage of your fishing rod convenient. Do not forget to give it proper care and attention for the longevity of your rod.
Fishing Reel Seat
The fishing reel seat is the part of the rod where the reel is attached. Typically, it consists of a pair of rings that secure the reel in place so that it stays connected when you cast or retrieve. You need a well-designed fishing reel seat for your fishing reel to function properly. It gives you stability and prevents the reel from wobbling or coming loose during use.
Rod Tip
The rod tip is the uppermost section of the fishing rod, which is located opposite the handle. It is often the most flexible part of the rod. With the rod tip, you can easily sense any subtle movements like bites from the fish. When you feel the underwater activity quickly, it increases your chances of success.
Fishing Spool
The fishing spool is a cylindrical component on a fishing reel that holds the fishing line. It rotates during casting and retrieval and allows the line to unwind and wind back into the reel. In simple terms, it’s where you store and release the fishing line. Different reels may have different types of spools. Choose the one that lets you easily control the fishing line when you are angling.
Different Types of Rods & Reels
Fishing offers a diverse range of experiences, and to make the most of your fishing experience, you’ll need the right rod and reel combination. Here are some different types of rods and reels you can explore according to your specific needs and preferences.
Spinning Rods
Spinning rods are the go-to choice for beginners and even professional anglers because of their usability for various fishing scenarios. They have an open-faced spinning reel attached, and it hangs below the rod, which makes them easy to use. These rods are available in different lengths to suit different needs. Spinning rods are perfect for casting light lures and bait. They are ideal for those who are just starting because they are easy to handle and less prone to backlash.
Conventional Rods
These rods are also known as baitcasting rods and are most popular among more experienced anglers. They pair with baitcasting reels, which sit on top of the rod. These rods are perfect if you are targeting larger species or fishing in a heavier cover.
Trolling Rods
Trolling rods are built specifically for trolling, it’s a technique where you drag bait or lures through the water behind a moving boat. They are often made of durable materials so that they can survive during boat fishing. These rods are perfect for anglers who are planning to cover large bodies of water or target fish that swim at different depths.
Threadline Reel
A threadline or spinning reel is the most common reel paired with spinning rods. It has a bail that can be flipped open, which makes it easy for line release during casting. These reels are beginner-friendly as they have a simple design and are easy to use. If you are new to fishing or just looking for a hassle-free experience, a threadline reel is the perfect choice.
Baitcaster Reel
Baitcaster reels are a common reel paired with conventional baitcasting rods. It sits on the top of the rod and requires a bit more skill to operate compared to spinning reels. These reels are mostly preferred by professional anglers because of their advanced control feature over casting accuracy.
Side-cast Reel
The said-cast reel or overhead reel is also mounted on the top of the rod. These reels are commonly used in saltwater fishing or to catch large and powerful fish. Side-cast reels are favoured for their durability and ability to handle heavy lines.
Game Reel
Game reels are heavy-duty reels designed for tackling large and powerful fish species, as they have strong drags and solid construction. They are perfect for offshore and deep-sea fishing enthusiasts who are targeting large species.
What is Fishing Rigs & Its Types
Fishing rigs are the combinations of knots, lines, and setups that increase your chance of a good catch. Using fishing rigs strategically, you can entice and catch fish easily. They can also be arranged to target different fish species or according to different fishing conditions. Remember, different fishing rigs and boat accessories have distinct purposes. So, you need to choose the right one for your needs.
Basic Bobber Rig
The basic bobber rig is a popular choice for many beginners. It consists of a bobber (also known as a float), a hook, and a sinker. The bobber keeps your bait swinging at a desired depth so that it can be visible to the fish. All you have to do is attach the bobber to your fishing line and add a sinker to help your bait sink to a desired level. Then, tie your hook a bit below the sinker. When a fish bites, the bobber will dip below the water’s surface, signalling it’s time to reel in your catch.
Sliding Sinker Rig
This rig is designed for bottom fishing. It has a sliding sinker that moves freely on the fishing line, a swivel, a leader line, and a hook. The sinker slides along the line and allows your bait to move naturally. The swivel prevents the sinker from reaching your hook. When a fish bites, you’ll feel the movement directly, and by setting the hook, you can reel in your catch.
3-way Fishing Rig
This rig can be used for both freshwater and saltwater fishing. It has a three-way swivel, a sinker and two leader lines with hooks. The swivel connects your mainline, a shorter leader with a sinker and a longer leader with a hook. It helps you fish at different depths simultaneously, which increases your chances of attracting fish.
Two-hook Bottom Rigs
This one is ideal for targeting bottom-dwelling species as it has two hooks attached to the mainline with dropper loops and a sinker to keep your bait on the ocean floor. The sinker helps your bait reach the bottom, where fish like flounder or catfish dwell. It increases your chances of hooking a fish.
Popping Cork Fishing Rigs
These are popular in saltwater fishing, especially for species like redfish and speckled trout. These rigs have a popping cork, a leader line, and a baited hook. The cork makes a popping sound when jerked, which mimics the sound of feeding fish. This attracts the nearby fish and gives you the opportunity to entice them with your bait.
Choosing the Correct Fishing Rod
When it comes to fishing, having the right rod is crucial to have a better fishing experience. There are different types of fishing rods available which serve different purposes. Here are a few simple tips to keep in mind when choosing the right rod:
If you are a beginner, start with a spinning rod, as they are ideal for casting light lures or bait. Once you gain some experience, you can explore more specialised options.
Different rods are better suited for different types of fish. Research the species you want to catch and choose a rod that matches those needs.
Check the rod’s power and action. Power indicates the rod’s strength, while action refers to its flexibility. Match these features to the type of fishing you are planning to do.
Hold a few rods to see which grip feels most comfortable in your hands. This will help you be comfortable even during long fishing sessions.
Choosing the Right Fishing Rig
Now that you have got the right rod, let’s talk about the fishing rig. These simple tips below will help you choose the right fishing rig:
If you are fishing in clear water, fluorocarbon might be a good choice. For general use, monofilament is often a safe bet.
Havier, more aggressive fish might require a stronger line. Adjust the line strength accordingly.
Pay attention to the line diameter as well. Thinner lines are less visible to fish but may sacrifice some strength. Choose a diameter that balances visibility and strength based on your needs.
How To Set Up A Rod: Step-by-Step Guide
Setting up a fishing rod may seem like a daunting task, especially if you are just staring. But fear not! We’ve compiled a list of simple steps to help you get your rod ready.
Step 1: Gather Your Equipment
Before starting with the setup process, make sure you have all the gear you need ready with you. This includes your fishing rod, reel, fishing line, and any additional tackle you plan to use.
Step 2: Understand the Important Parts of the Equipment
Take a moment to get to know your fishing rod. Understand the fishing pole, line, hook, handle, reel seat, etc.. Knowing these parts will make the setup process much easier.
Step 3: Connect the Reel to the Rod
Attach the rod’s reel seat.
For spinning rods, open the bail (the wire hoop) on the spinning reel and attach it to the reel seat. Close the bait afterwards.
If you are using a baitcasting rod, place the reel on the reel seat and tighten the locking mechanism until it’s secure.
Trolling rods usually have a reel seat with sliding rings. Insert the reel foot and tighten the rings to secure the reel.
Step 4: Spool the Reel
Carefully add the fishing line to the reel:
Place the reel on a flat surface and open the bail (for spinning reels) or engage the line release (for baitcasting reels).
Thread the line through the guides on the rod.
Step 5: String the Rod
Run the line through all the guides on the rod, starting from the tip. Ensure it sits within the grooves of each guide to prevent tangling. This helps guide the line during casting and retrieving.
Step 6: Tie the Knot
Secure the line to the reel with a reliable knot, like the improved clinch knot or Palomar knot. A strong knot ensures your line stays connected during the excitement of a catch.
Step 7: Set the Drag Knob
Locate the drag knob on the reel and adjust it to your desired setting. The drag controls the amount of resistance the fish feels when pulling on the line. Set it based on the type of fish you are targeting.
Step 8: Cast the Bait
Hold the rod at a comfortable angle and release the line with your free hand. Practice casting in an open area before hitting the water. For baitcasting, mastering the thumb-release technique is key.
Step 9: Reel in the Line
After casting, close the bail (for sinning reels) or engage the line release (for baitcasting reels). Wait for a fish to bite. Once you feel a nibble or see the line move, it’s time to reel in the line. Turn the reel handle steadily to bring the fish closer.
Step 10: Catch Some Fish!!!
Now that your fishing rod is all set up and your skills are sharpened enough, it’s time for some good catch. Be patient, stay focused and enjoy catching some fish. Happy fishing!
For many, owning a boat and experiencing the pleasures of riding into the laps of water or simply fishing can be a dream of luxury. Many people enjoy the experience of exploring the water bodies in their leisure time to calm their senses and feel relaxed and peaceful. These experiences can only be elevated with the right boat, which has all the essential structural needs and accessories to provide you with the utmost comfort and satisfaction.
To ensure that you have a boat that makes heads turn and enables you to fulfil all your boating dreams, you must hire suitable agents for boat building in Perth who understand your goals and help you turn them into reality. Here’s how you can choose the correct boat builder to achieve your dreams meticulously.
Understand your needs
Before going out looking for boat builders in your area, it is crucial to understand your needs and set your goals first to be able to hire the right builders that provide the services that you want. By understanding your needs, you must determine for what purposes you want to use the boat. Boats need different structures and boating accessories for other essentials like fishing, exploration, self-driving, etc. You must also decide the size, shape, colour, material, and layout of your boat to help you explain your preferences in a more straightforward way to the builders and get what you truly want.
Research and Verification
In the next step, you can start searching on the web or in any directory regarding local boat-building services that provide the requirements that you have set out for your dream boat. Once you make a list of boat builders, always verify their experience and shortlist some of the most experienced ones, as they understand how to build boats of different kinds and are skilled in replicating your visualisation. You must also verify their licences, compliance, and references before making the final decision.
Boatyard Visit
You can also ask the boat builders for a visit to the boatyard to observe their commitment to work and to check any finished product to see the quality of work that they have done. Assess the tools and materials they use and if they are updated with the latest equipment and boat-building technology. This helps in understanding their work ethics and commitment to quality. As a boat is a massive investment for life, this step is critical to ensuring that the investment doesn’t go to waste.
Customisation
Always go for boat builders that take customised requests to provide you with a personalised experience, as every boat is unique, just like the owner. You must always communicate and convey your requirements, and they should be able to accommodate those requests by incorporating your demands into the boat’s structure without any trouble.
Conclusion
Always check for licences, verifications, experiences, and the quality of material and work to ensure that you are hiring the best service providers. Boat building is a process of communication and collaboration. Clarify your needs clearly, and watch your dreams turn into reality.
Every boat owner prides themselves on owning a boat, which can be used for their passion for boating or a simple leisurely stroll on a water body. A boat is a lucid investment and can instantly elevate your lifestyle by adding luxury and sophistication to your life. Due to these factors, a boat deserves proper care and maintenance, as a shabby-looking boat can instantly reflect poorly on you and a messy boat can damage its structure and lead to breakage. To prevent all of these things, there are simple steps you need to follow to keep your boat clean, sturdy and shining for long. Here’s your guide to a clean boat.
Periodic Washing
You must always use the best boat cleaning products and supplies to wash your boat regularly. Due to the conditions of water bodies, your boat can accumulate slime, algae, grime and mud, which can affect its look and build. Exposure of the boat to harsh saltwater can lead to fading of its colour and rusting. Using boat cleaning soaps and soft bristle brushes, you can wash your boat and scrub away any dirt from the surface. Always be sure to clean both the interior and exterior of your boat and pay special attention to the mechanical parts that keep the boat running.
Gelcoating
Many people use a layer of gelcoat to keep their boat shining and protect it from external damage and degradation. Gelcoat is necessary to extend the lifespan of your boat by making it durable. The coat also helps make the boat look glossy, polished, and shining. It also protects the boat from oxidising agents and harmful sun rays, which can fade its colour. Constantly update your boat’s gel coat once a year for maximum protection.
Cleaning the Canvas
Every boat owner seeks comfort in their boat, and for the same reason, they have cushions, canvas, and upholstery on their boat, but they can be exposed to dirt, dust, and other staining agents. Therefore, it is essential to clean them properly using mild detergents to prevent the growth of moulds and harmful microorganisms that pose a health risk. Dry them thoroughly before reinstalling them on the boat.
Attention to the Stainless Steel
Boats have components made of stainless steel. Usually, the rails, cleats, and other rigid exterior structures employ steel, which is vulnerable to rusting and corrosion. To prevent rust, you need to polish these surfaces regularly and paint them with corrosion-resistant paints. Rusting can lead to breakage and wear and tear on the boat, and therefore, you need to pay special attention to the steel to protect the structural integrity of your boat.
Storage Solutions
Always having things lying around on your boat in a messy condition can make the boat look uncared for and can lead to unwanted damage. Therefore, it is crucial to have proper storage spaces and cabinets on the boat to store your marine supplies and make it look organised.
Conclusion
Give proper care and caution to your boat to make the most of such a momentous investment. Extend its durability through regular maintenance and best cleaning practises. Happy boating!
 Call
Call 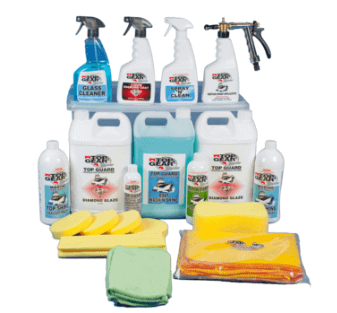


 Unit 2, 25 Emplacement Crescent
 08 9433 2224
